
I love wreaths, I love burlap, I love fun fabrics, I love decorating. I don't love storing tons of holiday and seasonal decorations or spending the extra money to buy new decorations for each season. So I came up with this idea: a changeable wreath. I don't really like the name, but I googled synonyms for changeable, and the ones that came up - convertible, malleable, modifiable, adaptable - didn't really fit either. So for now, it's the "Changeable Wreath." (Although in my mind, her name is "A-wreath-a Franklin." :)
I need to remember to take more pictures of the actual process and not just the end results. But we'll just go with what I have. The materials I used included: a straw wreath, burlap, coordinating fabrics, glue gun, buttons, and velcro. Here's the super simple directions for the wreath part: cut strips of burlap (I cut mine about 2 or 3 inches wide). Use your hot glue gun and wrap the strips around the wreath (overlapping a little), gluing with every turn. I left the plastic wrap on, which is probably the way to go, because then you aren't dealing with a straw mess. Easy, right?
Next, I made flowers from fabric. I used the the tutorials found here and here for a little variety. I played around with the flowers on the wreath for awhile, and when I had them positioned how I liked them, I grouped them into 3 sections and hot glued them together. I then put a piece of velcro on the back of each group - first just sticking it on, then after realizing the velcro pack actually read, "not recommended for fabric," I ripped it off and hot glued it on instead. Yep, the glue gun is my friend. I'm guessing at some point, it's going to rip off again, so what I actually recommend doing is taking the extra two minutes and sewing the velcro on.

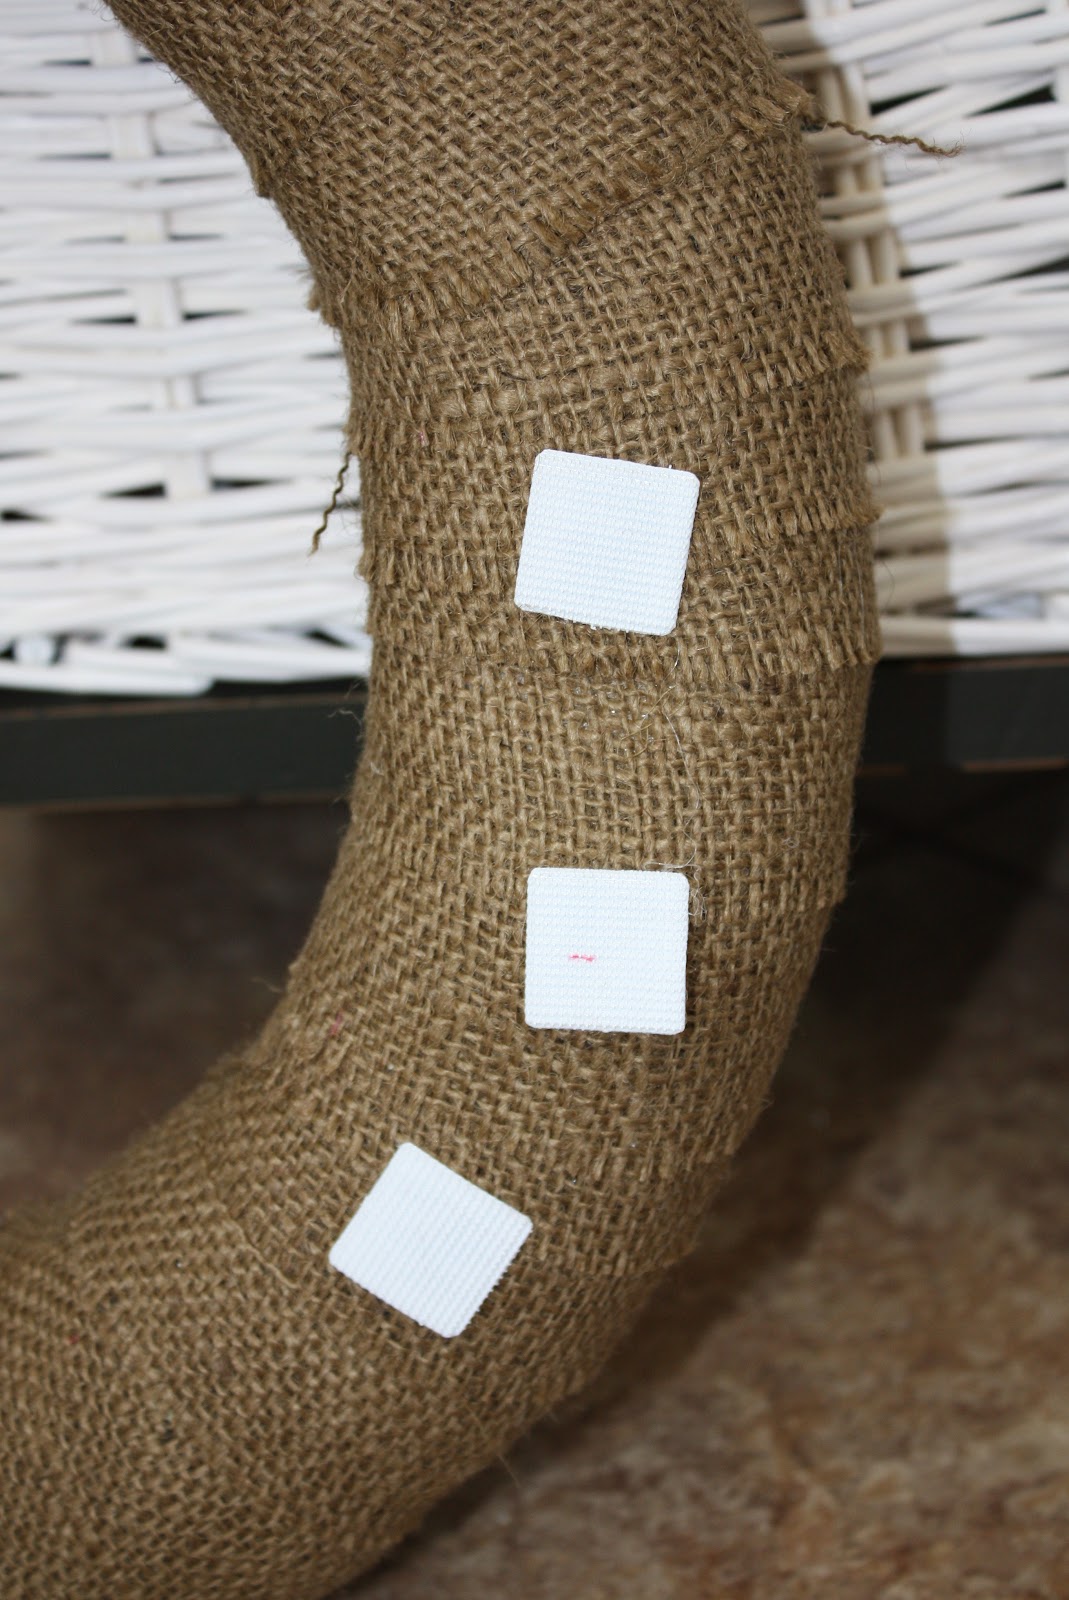
Put the other side of the velcro in three places on your wreath (again, I hot glued)...
So here's the first version of the wreath....The Valentine's Day version...


I love the shabby look of the burlap and fabrics....(not so much the strings of glue, but just pretend you don't see those...)

The Valentine's Day version turned out so cute that you almost forgot about the BEST part, didn't you?! You can change it up for the next occasion!!! So, here's the March/St.Patty's Day Version...

and here's a pile of fabric waiting to be transformed to make a fun beachy/summery version...

The possibilities are endless! Just by using fabric scraps you can totally transform the look whenever a new holiday is approaching, or even if you get sick of looking at the same old thing! You can always add other things besides fabric flowers, of course. I have some fun silvery berries that I want to incorporate into a winter version.
Of course I still need to find a great spot for her. I plan on using a thin strip of burlap for that too. I had originally planned on hanging it on the front door, but now I'm thinking an indoor spot might be better so it lasts longer. Maybe I'll just have to make another one for the front door!


27 comments:
What a clever idea!
Love this project!
I did a similar wreath last year starting. It's a lot of fun!
http://hopeabound.blogspot.com/2010/10/transitional-fall-wreath.html
Where do you buy your fabric from?
This is too adorable! Love it!
What a great idea! Thanks for sharing.
www.oursevendwarfs.com
Fantastic idea I will be using this!
HOW CUTE! I just made myself a burlap wreath and never thought to use velcro to change it up. Such a great idea. Love it!
{Heather}
love2sisters.blogspot.com
Such a great idea! Looks really cute :)
Angie, I love your wreath and the use of velcro to change things up. Very inventive. Thanks for mentioning my rag fabric flowers. They look great on your wreath, especially when you used such colorful fabric.
Cheers,
Tracy
So so cute & clever!
~Mary
www.thecraftygals.blogspot.com
Beautiful! I should do that to me Halloween wreath that I never finished!
What a cute idea. I am going to have to make myself one just like it. So darling!!!
Brilliant!! I LOVE it. Love it, love it! I saw this on Tatertots & Jello's FB page and I'm now posting it on mine as well : )
craft-interrupted.blogspot.com
This is perfect! I love burlap, and I love anything you can change out with the seasons or update as your mood changes. Just great.
I found you at the Shabby Chic Cottage, and I'm your newest follower!
Come visit!
Kelly
LOOOOOOOOOOOOVE IT!
Wonderful! This is just fantastic! You did an amazing job...and I LOVE the fabrics you plan on using for your "beachy" wreath...;)
Love this idea - I was thinking about doing a wreath like this with burlap and I LOVE the velcro to change out the designs! I am definitely going to borrow this and link back! :)
Oh I just LOVE THIS! Thanks for sharing, I have a feeling we'll be the proud owners of one in the near future! :)
What a great idea to keep things cheap from season to season and to stay creative! I love this idea!! I might have to have a craft day with my friends to make these! They'd LOVE them!!! Thanks so much for the idea!
If we do this project I'll be linking back!
Wow I love it, so creative!!!
What a great idea! I made a similar wreath, but didn't think of putting the flowers directly on the wreath. Genius, I love it! I linked mine up to Bubbly Nature Creations too. Thanks for sharing.
What an ADORABLE idea ~ soooo cute & I love that it can be changed each month for a fresh new look!
~ Heidi
I love that you can change it!!! This goes on the project list for sure!
I have been planning on making a burlap wreath myself! Cute! amomseyeview-lulu.blogspo.com
Love your wreath! :)
Well you've just got the neatest idea for a changeable wreath - I love that! Each time it looks so cute, and can't wait to see what you do with the other fabrics! I found you at the burlap linky party, and I followed your blog. Thanks for sharing with us!
Mary @ Redo101.blogspot.com
Post a Comment