Showing posts with label kiddie projects. Show all posts

Tuesday, September 27, 2011

Fun Fall Activity Repost

Looking for a fun fall activity to do with your kiddos?  I'm reposting this from last fall, back when I was the only one who regularly checked my blog!

Ok, so probably everyone has done this craft.  It certainly isn't original but it came out of the recesses of my brain today when I was trying to think of a simple fun activity to do with Jackson while Carly took her nap.  It's easy, cheap, already had all the supplies on hand, and it can double as some fall decoration - so that makes it a win-win-win-win in my book!


Materials needed:  crayons (preferably old or broken ones), crayon or pencil sharpener (or old cheese grater), wax paper, newspaper, scissors, iron, marker.

Layer newspaper, one sheet wax paper, crayon shavings, wax paper, newspaper.  I used an old tea towel on top of it all, too. 

Iron on low setting just until the crayon is melted.  Draw your leaves (don't be jealous of my sweet leaf drawing skills!) and cut them out.  (For the pumpkins, we drew them first so we knew where to put the orange & green). 

Tape or hang them on a window and admire your new cute suncatchers!

(Yep, it's definitely afternoon & he's definitely still wearing pajamas).

Linking to:  The DIY Showoff's Fall Festival Party

Thursday, May 5, 2011

Personalized Glass Stone Magnets

I've had the materials to do this project for awhile, and with Mother's Day on the horizon, I thought it would be the perfect time to break out the Mod Podge!

Here's the materials you need:


Glass stones ~ from Dollar Tree:  $1/bag
Magnetic Tape ~ around $2.99 for the whole roll
Mod Podge, Paper Scraps ~ on hand!

There are so many things you can do with these, but since we were making these for Mother's Day presents for the grandparents, we wanted to personalize them a bit.  Jackson drew some hearts and faces, and wrote names. 


After he drew the pictures, I would place a stone on top, trace around it, and then cut it out.  Then it's time for the Mod Podge!  Brush a light coat of Mod Podge on the top of your piece of paper, and press it onto the bottom of the stone.  When you look at the front, it will look gluey, but don't worry, it dries clear!


I stacked some heavy books on top of the stones to make sure the paper dried flat, and then when they were dry, I did another coat of Mod Podge on the back.  After it dried, it was time for the magnets.  Just cut the magnets to the size you need, peel off the backing, and stick them on!  Again, I stacked some heavy books on top just to make sure the magnets stuck on nice and tight.


When Jackson finished his part of the project, I also made a few more versions using family themed scrapbooking paper, cutting out words like "love" and "family."  We made enough to give out several to some special people.....here's one of the sets....

Please pretend you don't see the smudges on my fridge!
Quick, inexpensive, and personalized....nice!  I think we're going to make some more for Teacher Appreciation Week or end-of-school presents!


Linking these up to some of my favorites!
Visit thecsiproject.com

Thursday, April 28, 2011

Cupcake Liner Flower Bouquet

Jackson loves to do projects and wanted to do something special for his Nana's birthday a few weeks ago.  We brainstormed and decided we'd give her a bouquet of flowers.  This is one of those super easy kid projects that they can do mostly by themselves and be so proud of the end result!

Materials needed:  white cupcake liners, green chenille stems (aka pipe cleaners), watercolor paint.

Step 1:  Decorate the cupcake liners using the watercolor paints.  For optimum performance, your child should still be wearing their jammies and also have bed head.


Step 2:  Allow liners to dry completely.


Step 3:  Roll one end of the stems a few times, then gently push the other end of the stem through the cupcake liner and pull all the way through.  The rolled end will catch, and you will "bunch up" the liner around it to create the flower.


Step 4:  Gather into a bouquet and enjoy!


We made these as a birthday gift, but they would also be perfect for Mother's Day, Teacher Appreciation, or even a 1st Day of Spring activity!  You can get as creative as you want....adding construction paper leaves would be another easy option.


Linking up to a few of my favorites!

So happy to be featured!!


Tuesday, March 8, 2011

Cute & Simple Teacher Gift

We appreciate the teachers at Jackson's school so much!  It's not always possible to go "all out" for multiple teachers' birthdays and holidays, but it's nice to try to show our love and appreciation with something little.  Today he went to school with this card for his teacher's birthday....


His preschool writing is a little hard to read, but the inside of the card reads, "You Are Sharp!  Love, Jackson."  And of course, we taped the Sharpies in.  'Cause we're cheesy like that.


Wednesday, March 2, 2011

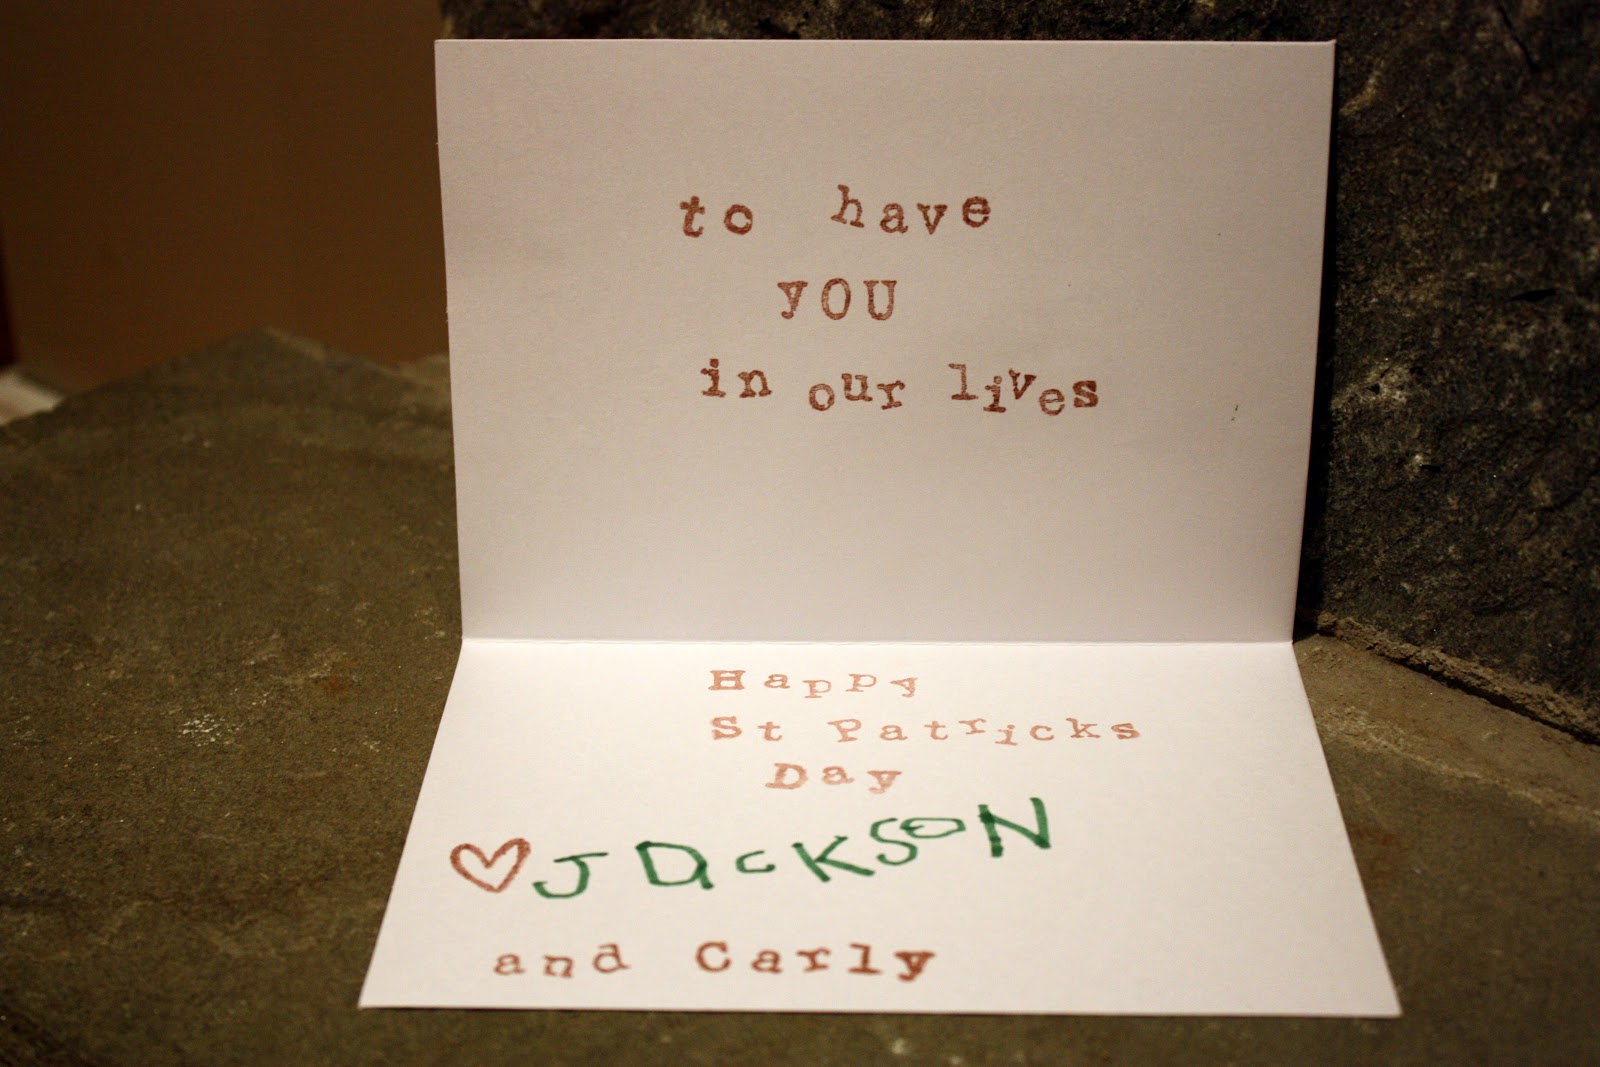
St. Patrick's Day Thumbprint Cards

Step #1:  Wrangle 16 month old.  Paint her thumb and press it on the card in groups of 4.  Wipe the rest of her off, which is now covered with paint.  Sigh.  Pray.  Wonder why in the world I didn't use ink instead of paint!!  Repeat #1 for as many cards as you plan to make.

Step #2:  Put the girl to bed.  Repeat #1 with almost 5 year old - not nearly as much wrangling required.


Step #3:  Have the boy draw stems on the groups of 4 thumbprints, making them look at least a little like 4-leaf clovers.


Step #4:  If your kiddo is older, they can write it themself, but I stamped a few words on the front and inside, and had J sign his name to all of them.  Here's how a few of them turned out....


The ones for Jackson's teachers look like this on the inside...


And the ones for family look like this (if you are a family member who might be receiving one of these in the next week or so, please feign surprise and excitement if it is hand delivered)....


Step #5:  Wonder why I was so intent on using thumbs and not fingers?  I think fingers would have been easier.

I certainly could have made these cuter by adding embellishments or using scrapbook paper, but the goal for these were to make them simple and kid-friendly - I think they turned out cute!

Click here for a list of parties I may have linked to!


Wednesday, February 2, 2011

Happy (Early) Chinese New Year!

With tomorrow being Chinese New Year, yesterday Jackson and I made some decorations to make our guests feel more at home.  We used the directions here to make Chinese paper lanterns and strung them up in our dining room. 

They turned out cute, and the boys loved them - I saw them taking pictures of them this morning when they didn't think I was looking :)
Side note:  isn't it lovely how the Wii brings the world together?  (Or at least serves as a great icebreaker with teenage boys?)
After trying our hardest to keep their names straight and pronounce them correctly (Chang and Xiong, which interestingly enough, sound pretty similar), last night Xiong typed his name into the Wii as "Joe" and told us that is his nickname....makes me think of a quote from Adam Sandler in the movie The Wedding Singer...."that information would've been more useful to me yesterday!"  :)

Thursday, January 27, 2011

Snow Ice Cream

Snow day!!  Since Jackson goes to school twice a week, I can be excited about snow days again!!  I wanted to do something fun with him today, but we're all still fighting colds so I didn't think playing outside would be the best.  He actually asked for ice cream this morning, and little did he know I already had a plan...snow ice cream!
It's very easy, quick, and of course cheap to make.  In a medium sized bowl, combine 1 cup milk, 1/2 cup sugar, and 1/2 teaspoon vanilla.  Stir until the sugar is dissolved.
Go out and collect 4-5 or more cups of clean fresh snow - don't pack it, just scoop.

Add the snow to the milk mixture a little at a time, stirring to mix.  Stop when the consistency gets how you want it.  We probably could have added a little snow more snow to ours, or even put it in the freezer for a bit, but we were impatient and wanted to try it.  Here's our finished product....
Actually, those were almost the finished products.  Here's the actual finished product, with an added ingredient suggested by Jackson.
Time to taste!  Was it a success?
Definitely!

Click here for a list of parties I may have linked up to!


Thank you ~ I'm so honored!


Bubbly Nature
 

also featured here...


Keep Home Simple


thanks!!

Tuesday, January 18, 2011

Quiet Time Activity: Sticker Book

We're in the thick of the cold and flu season.  Our family hasn't been hit too hard, but for a little while we were sick on and off - stuff just seemed to be lingering.  One weekend, Jon and I were both sick with something stomachy, something was weird with Carly because she was just sleeping the day away, but other than being a little tired, Jackson was just fine.  I felt bad for the poor kid because no one felt like playing with him, so I came up with this super simple idea that kept him busy for a LONG time....
A sticker book!  He has waaaaay too many stickers that I can't bring myself to just throw away to pare down the amount.  I got out a simple composition notebook (you can stock up on these at CVS at the beginning of the school year - they usually have them free after ExtraBucks), his enormous pile of stickers, and let him go to town! 
He loved it, he's finally using his stickers, and it kept him busy while I lounged on the couch sipping ginger ale and wishing I would just throw up :)  (I never did, and we're all better now...thanks!)

Friday, December 17, 2010

Christmas Craft: Trees

Jackson is having so much fun being creative and doing crafts lately, so when Carly takes a nap, I usually try to think of a fun project for us to do.  Today we made Christmas trees!  The styrofoam cones were from Dollar Tree, the sparkly pom poms were from Joann's in the dollar section, and I had the rest of the supplies on hand, so this was a really fun and inexpensive craft for us to do together.

I had seen this tree at Target and wanted to make something similar....
For J's, I cut up squares of green construction paper and had him glue them all over the styrofoam.  There is a definite reason why gluesticks are more popular than regular white glue....what a mess.  Plus he got bored about halfway through so I had to finish sticking on the construction paper.  After that, I used the glue gun to put on everything else exactly where he showed me.

Here's our final products!  I love them!

Click here for some parties I may have linked up to!

Monday, October 18, 2010

Melted Crayons & Falling Leaves

Ok, so probably everyone has done this craft.  It certainly isn't original but it came out of the recesses of my brain today when I was trying to think of a simple fun activity to do with Jackson while Carly took her nap.  It's easy, cheap, already had all the supplies on hand, and it can double as some fall decoration - so that makes it a win-win-win-win in my book!

Materials needed:  crayons (preferably old or broken ones), crayon or pencil sharpener (or old cheese grater), wax paper, newspaper, scissors, iron, marker.

Layer newspaper, one sheet wax paper, crayon shavings, wax paper, newspaper.  I used an old tea towel on top of it all, too. 
Iron on low setting just until the crayon is melted.  Draw your leaves (don't be jealous of my sweet leaf drawing skills!) and cut them out.  (For the pumpkins, we drew them first so we knew where to put the orange & green). 
Tape or hang them on a window and admire your new cute suncatchers!

(Yep, it's definitely afternoon & he's definitely still wearing pajamas).

Related Posts Plugin for WordPress, Blogger...